Git! Commands you need to git going.

First off, let’s ensure git is installed — if not, check the relevant link below for your system:
For the purposes of this post, I will be following a flow that you would most likely use for a new repository, although some steps will be used for existing ones.
Also, for other commands — for example when making a new directory, I will be using BASH shell commands. Here is a handy reference for those.
Create a new repository:
First of let’s make a new directory in which to keep our repository:
$ mkdir newRepoNow will move into that new directory:
$ cd newRepoWe create this as a new git repository by issuing:
$ git initTo clone an existing repository:
From a server i.e. GitHub:
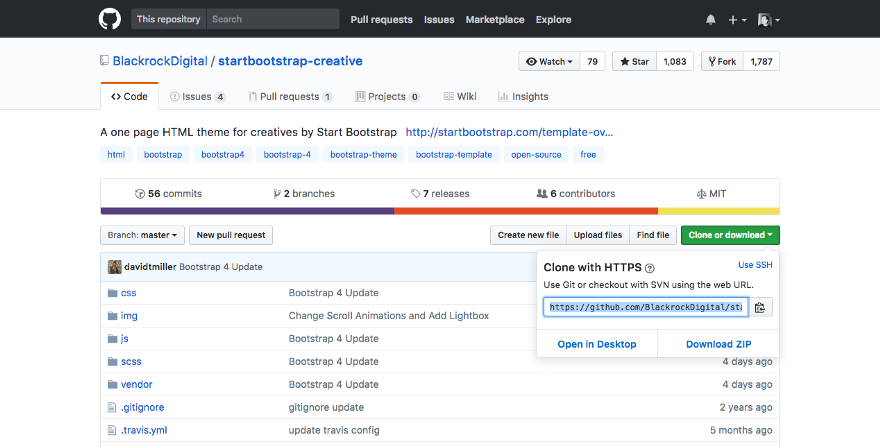
$ git clone https://github.com/path/to/repository.gitFor example, to clone a bootstrap starter template from here:
$ git clone https://github.com/BlackrockDigital/startbootstrap-creative.gitYou will look for the green button saying “Clone or download”:
Or …
From an existing repository on your local machine:
$ git clone /path/to/repositoryAdding a file to git:
Now that we have a repository set up, we need to add some files for git to track:
add all new and modified/edited files in the directory:
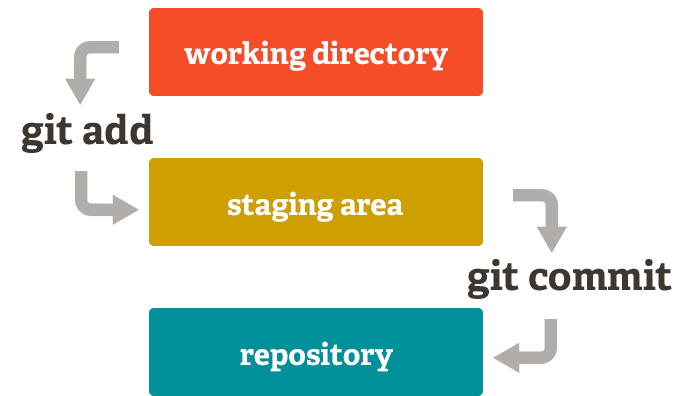
$ git add .Now, we asked git to add files, we then need to commit those files:
$ git commit -m "add these changes"In the above command we are saying a couple of things:
git commit ...=> commit the added files.... -m "add these changes"=> -m will precede a message which will let people know what changes are included in this commit.
Pushing our commits/changes to the remote repository:
Once we have added then commited our files , we now need send or push those changes to our repository:
$ git push origin masterIn the above command are saying the following:
git push ...=> send our changes.... origin ...=> the location of our repository.... master=> the branch name, we will talk more about branches shortly.
Branches:
Let’s say that you are building an app or project which may have several different features. Good practice is to split the app development into the separate features.
Let’s imagine we are making an app and one of the features we need to code for may be the login system …
With git we can make a new branch called login:
$ git checkout -b loginIn the above command:
git checkout=> switch to the following branch name.... -b login=> -b will precede the new branch name
The above command is actually a condensed one in the sense that it is actually checking out and creating a new branch in one pass.
If we already had a branch created called login we could switch to it simply by:
$ git checkout loginPushing a branch:
What we did above was simply make a local branch. In order for it to be accessible to others, we will need to push it to our remote repository:
$ git push origin loginPulling:
Let’s say we need to retrieve all the latest updates to our remote repository — for example if you and your team are working on the same project from different machines, another team member may have made some changes and you want to make sure you are up-to-date:
git pull => tells git to retrieve the latest version.
Merging:
If we want to merge of combine our commits made in our login branch we made earlier into the master working branch:
Lets’s first checkout our master branch:
$ git checkout masterThen we can merge the new branch with:
$ git merge loginAfter issuing a merge command, the git system will merge the branches, but this is not always possible for git to achieve automatically .
If you need to resolve these conflicts yourself, there is an easy-to-follow guide here.
Undoing changes:
You will most certainly face an occasion where you need to undo changes to the local repository — for example you want to remove changes you made to a file called index.html :
$ git checkout -- index.html
If you would like to remove all changes and revert back to the latest remote version:
=> get the latest remote version:
$ git fetch origin=> remove all local changes:
$ git reset --hard origin/masterHelpful links:
These are some worthy resources when you are comfortable exploring further features (there are many) of git:
I will do further posts on more advanced features, but for now, that’s all folks …
You can get a $100 free on DigitalOcean using this link here.
If you have any questions or additions to make, please let me know in the comments below or get in touch on Twitter.
~ Dave.
✌️


